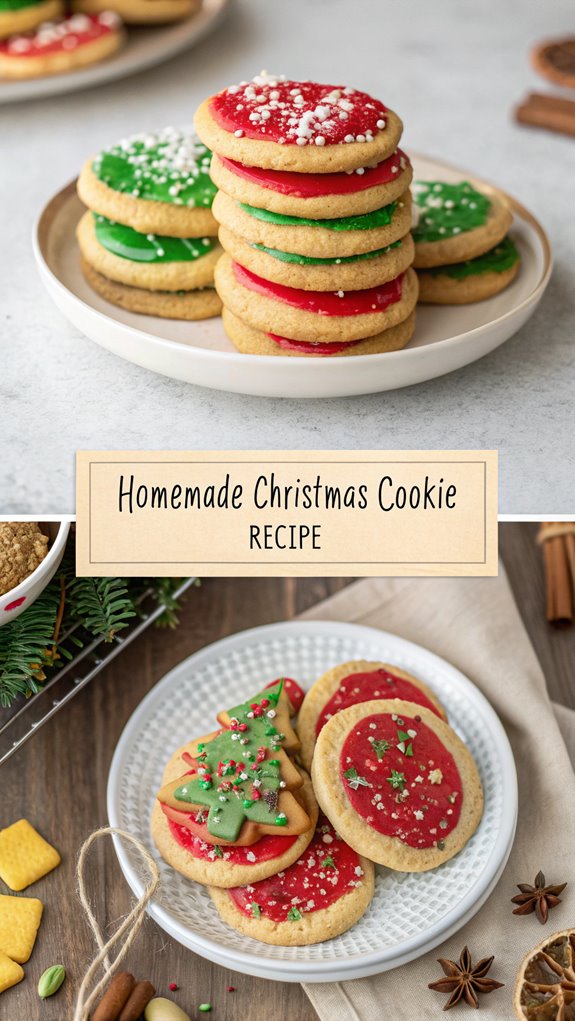
Homemade Christmas Cookie Recipe
To make homemade Christmas cookies, gather these ingredients: 2 ½ cups all-purpose flour, 1 tsp baking powder, ¼ tsp salt, 1 cup unsalted butter (softened), 1 cup sugar, 1 egg, and 1 tsp vanilla extract. First, whisk the dry ingredients together in a bowl. Then, beat the butter and sugar until light and fluffy. Mix in the egg and vanilla, followed by the flour mixture until combined. Chill the dough for 1 hour. Roll, cut, and bake at 350°F for 10-12 minutes. Decorate with icing and sprinkles for a festive touch, and there’s more to explore for detailed techniques.
Why You’ll Love this Recipe
When you dive into this homemade Christmas cookie recipe, you’ll discover not just delicious treats but also a chance to create cherished memories with your family.
Baking cookies together enhances child development by fostering motor skills and creativity. It promotes traditions, spreading Christmas cheer and helping you bond with your loved ones. Involving kids in the process teaches valuable skills like measurement and patience while encouraging participation in a fun family activity. Additionally, baking encourages emotional regulation as children learn to handle mistakes and setbacks during the process.
Plus, you’ll enjoy the educational benefits of baking, such as learning about mixing and timing.
Overall, this recipe offers a perfect blend of enjoyment and learning, making your holiday season memorable and meaningful.
Recipe
Homemade Christmas Cookie Recipe
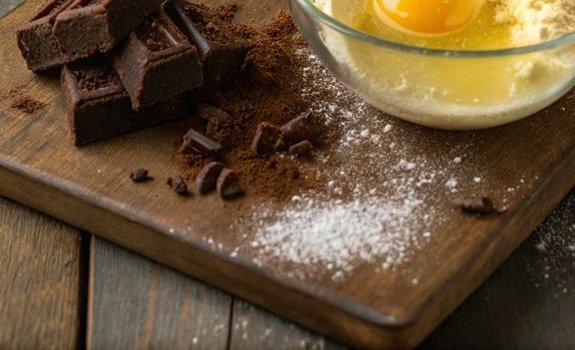
The holiday season is the perfect time to indulge in the joy of baking, and nothing brings the festive spirit quite like homemade Christmas cookies. These delightful treats aren’t only a delicious addition to any holiday celebration but also an enjoyable activity for family and friends. With a simple dough that can be customized with colors, sprinkles, and icing, these cookies are sure to be a hit with everyone. This recipe is designed to be straightforward, allowing bakers of all skill levels to create beautiful and tasty cookies. The basic dough can be flavored with vanilla and can be easily adapted to include your favorite spices or extracts. Baked cookies can be stored in the freezer for up to 3 months, allowing you to prepare ahead of time and enjoy them during the holiday festivities.
Once baked, these cookies can be decorated in a variety of ways, making them not only a treat for the taste buds but a feast for the eyes as well.
Ingredients:
– 1½ cups plus 1 tablespoon all-purpose flour
– 2½ cups sifted all-purpose flour
– 2¼ cups all-purpose flour
– 3 cups all-purpose flour
– 1 teaspoon baking powder
– 1 tsp baking powder
– ½ teaspoon baking powder
– ½ teaspoon baking soda
– ¼ teaspoon salt
– ½ teaspoon kosher salt
– 1 tsp salt
– ½ teaspoon salt
– ½ cup unsalted butter, softened but still cool
– 1 cup unsalted butter, softened
– ¾ cup unsalted butter, softened to room temperature
– 1 cup unsalted butter, cold
– 1 egg
– 1 tsp vanilla extract
– Sprinkles (optional)
– Confectioners’ sugar (for icing)
– Light corn syrup (for icing)
– Food coloring (optional)
Cooking Instructions:
1. In a large mixing bowl, whisk together the flour, baking powder, baking soda, and salt until well combined.
2. In a separate bowl, beat the softened butter and sugar together until the mixture is light and fluffy. This may take about 2-3 minutes with an electric mixer.
3. Add the egg and vanilla extract to the butter mixture, mixing until fully combined.
4. Gradually stir in the flour mixture, ensuring everything is well blended and no dry ingredients remain.
5. Once the dough is formed, wrap it in plastic wrap and chill it in the freezer for 1 hour. This will make it easier to roll out later.
6. Preheat the oven to 350°F. While the oven heats, prepare your work surface by generously flouring the rolling pin, your hands, and the surface.
7. Roll out the chilled dough to your desired thickness—1/4″ for thinner cookies or 1/2″ for puffier cookies. Use cookie cutters to cut out shapes.
8. Place the cut-out cookies on lined baking sheets and, if desired, add sprinkles on top before baking.
9. Bake in the preheated oven for 8 to 10 minutes, keeping an eye on them. Remove the cookies when they’re lightly golden brown around the edges.
10. Allow the cookies to cool completely before decorating with icing or stacking them with more icing in between.
Extra Tips:
To ensure your cookies turn out perfectly, be sure to measure your ingredients accurately and keep the butter at the right temperature.
If you’re using food coloring, divide the dough into portions and knead in the color until evenly distributed. For a creative touch, experiment with different shapes and sizes for your cookies.
Lastly, don’t forget to have fun during the decorating process! It’s a great opportunity to unleash your creativity and make each cookie unique.
Final Thoughts
Baking Christmas cookies isn’t just about following a recipe; it’s about creating lasting memories and enjoying the festive spirit with loved ones.
To make the process smooth, chill your dough to prevent stickiness and roll it out evenly to about 1/4 inch thick. Set your oven timer to the minimum time to avoid overbaking, and remove cookies right after baking to prevent continued cooking. Incorporating refrigerated dough can also simplify the preparation process for those with busy schedules.
For decorating, use a simple icing, add sprinkles, and consider using a plastic baggie for drizzling.
Remember to soften butter, measure flour accurately, and chill dough before cutting.
With these tips in mind, you’ll create delicious cookies that your family will cherish for years to come. Happy baking!
Frequently Asked Questions
Can I Substitute Gluten-Free Flour in This Cookie Recipe?
Yes, you can substitute gluten-free flour in your cookie recipe. Just use a 1:1 gluten-free blend like King Arthur or Bob’s Red Mill, and consider adding xanthan gum for better texture. Enjoy your baking!
How Long Do These Cookies Stay Fresh?
Cookies typically stay fresh for about 5 days at room temperature if stored correctly. Using airtight containers can extend their freshness up to two weeks, while freezing can last for 3-6 months.
Can I Freeze the Cookie Dough?
Yes, you can freeze cookie dough! Shape it into discs or logs, wrap it tightly, and store it in airtight containers. Just remember to label it and adjust the baking time when you’re ready to bake.
What Toppings Can I Add to These Cookies?
You can add sprinkles, icing sugar, or candy pearls for a classic touch. For something unique, try crumbled potato chips or candied bacon. Get creative with marshmallows or edible glitter to make them stand out!
Are There Any Egg Substitutes for This Recipe?
Yes, you’ve got several egg substitutes! Mashed banana, applesauce, or yogurt work well. For a vegan option, try flaxseed or aquafaba. Each substitute alters flavor and texture, so experiment to find your favorite!